
Why DIY epoxy kits are so appealing
It’s easy to understand why DIY epoxy kits have become so popular.
They’re affordable. They’re easy to find. The packaging makes the process look straightforward: clean the concrete, roll out the coating, scatter some decorative flakes, let it cure, and suddenly the garage looks cleaner and more modern.
For many homeowners, the appeal is not only the saving. It is also the satisfaction of doing the work yourself.
The challenge is that epoxy flooring looks more like painting than it really is. Rolling a coating onto concrete is only the visible part of the job. The result also depends on the concrete condition, surface preparation, product thickness, flake coverage, topcoat choice, cure time and how the floor is used afterwards.
That is why two floors can look similar on day one but perform completely differently twelve months later.
The biggest mistake is not buying a DIY epoxy kit. The biggest mistake is expecting a retail kit to perform like a commercial flooring system without understanding the differences.
A better way to think about floor failure: The Fatal Five™
Inside our own business, we use a simple framework we call The Fatal Five™. It is our way of thinking about the main reasons epoxy floors fail or disappoint people.
The five issues are UV damage, hot tyre pick-up, delamination, slippery surfaces and inappropriate, toxic product selection.
This article focuses mainly on the four problems that show up most often with DIY garage floor kits: UV yellowing, hot tyre damage, patchy coverage and poor surface preparation. Slip resistance and product safety still matter, but they deserve their own detailed discussion.
Instead of asking, “Is epoxy good or bad?” the better question is, “Has this flooring system been designed to handle the real problems this space will face?”
Problem 1: UV damage and yellowing
Most people do not think about sunlight when they are coating a garage floor. It is inside the house, so it feels protected. But many garages still receive direct sunlight through the open door, side windows, glass panel doors or afternoon sun that reaches into the slab.
Epoxy does not play well with ultraviolet light. When exposed to UV, it will amber, yellow or brown over time. This is not a sign that the installer did something wrong, it is chemistry. Some products handle UV better than others, but epoxy left exposed to sunlight will eventually change colour.
DIY kits make this more visible because many use partial flake coverage. The flakes are scattered lightly across the surface, but large areas of epoxy remain exposed. Those exposed areas receive the full impact of sunlight, while the areas under flakes are more protected. Over time, the floor will look uneven, patchy or older than it really is.
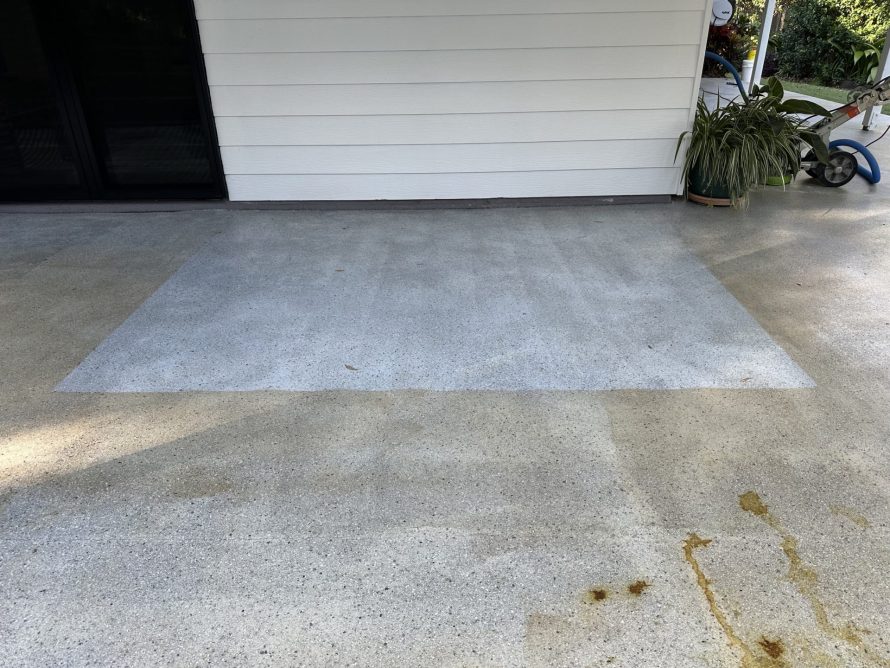
The expectation is: “The floor will stay the colour it was on the day I installed it.”
The reality is: if epoxy is exposed to UV, colour will change. If the coverage is inconsistent, the colour change will look inconsistent too.
A full flake floor works differently. Professionals often broadcast flakes to refusal, which simply means flakes are applied until the wet coating will not accept any more. The excess is removed later, leaving a complete flake layer that hides and protects the epoxy base coat.
If you are determined to use a DIY kit, one of the simplest ways to improve the result is to buy far more flake than the kit supplies. A light sprinkle may look decorative, but it will not provide the same visual consistency or UV protection as a full broadcast system.
It is also worth asking what clear coat or topcoat the system uses. A UV-stable topcoat does not magically make every system perfect, but it can make a meaningful difference when sunlight exposure is part of the environment. Here’s a word of caution: most DIY kits don’t include a topcoat. So you will need to source one of these to keep the floor and flakes from getting filthy.
Problem 2: Hot tyre pick-up
Hot tyre pick-up is one of the problems that catches homeowners by surprise because most people never think about how much heat their tyres carry into the garage.
After a drive, your tyres are warm. On a hot day, after highway driving, they can be much warmer than you expect: think 60-70c.You pull into the garage, park in the same position you always park, and the tyres sit on the coating while everything cools down. The tyres then contract as they cool and place pressure on the floor while doing so.
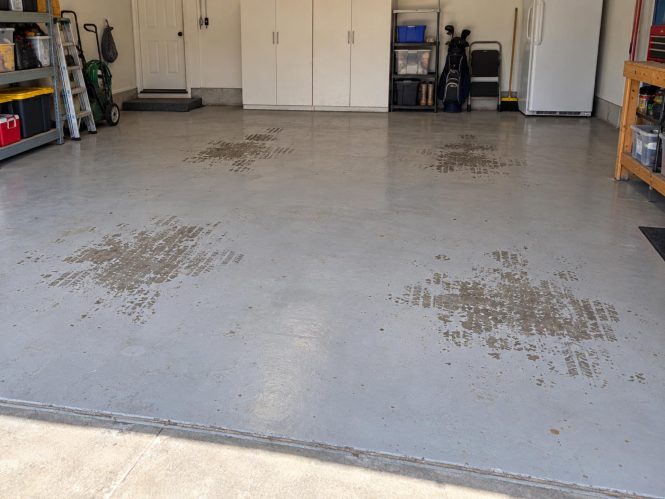
If the coating is too soft, too thin, poorly cured or poorly bonded to the concrete, that heat and pressure can create problems. Sometimes it starts as tyre marks that will not clean off. Sometimes the coating softens and deforms. In worse cases, the bond between the coating and concrete fails, and part of the floor lifts when the vehicle is driven away.
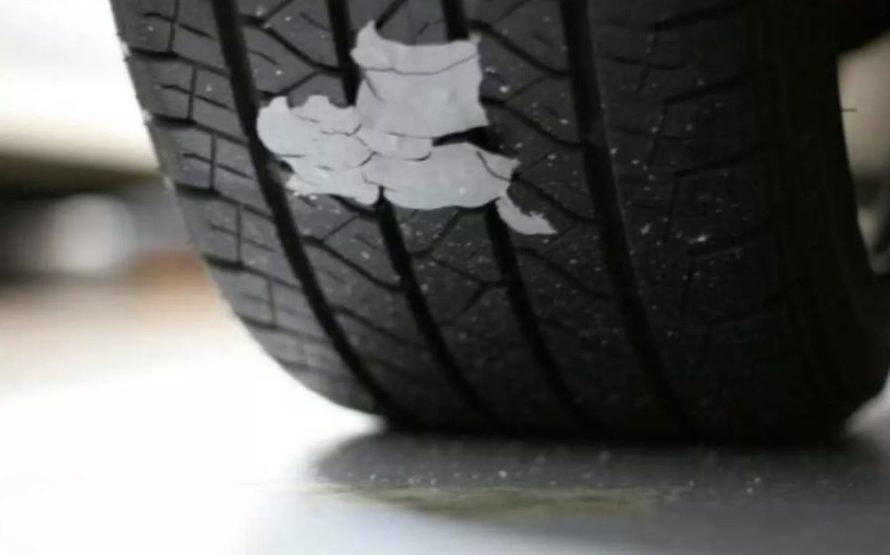
That is hot tyre pick-up.
The floor may look fine at first. Then the same tyre positions start to show marks. Traffic paths become dull. The surface wears faster where the car sits. Eventually, the owner realises the coating is not coping with the real use of the garage.
The expectation is: “It is sold as a garage floor coating, so cars should not be a problem.”
The reality is: not every coating sold for garages is engineered to deal with repeated hot tyre exposure over time.
This is where product selection, film build, the amount of resin in the epoxy and surface preparation all matter. A stronger coating over poorly prepared concrete can still fail. A well-prepared floor coated with a product that softens too easily can still disappoint. The system has to work together.
If you are comparing DIY products, look for clear information about hot tyre resistance. Also pay close attention to cure times. Driving on a coating too early can damage it before it has reached its intended strength.
When in doubt, wait longer than the minimum time printed on the box, especially in cooler weather or poor curing conditions. Dry to the touch does not always mean fully cured.
Problem 3: Patchy appearance and uneven coverage
The next issue is appearance. This is where many DIY floors disappoint people immediately, before any long-term durability problem has appeared.
The box shows a clean, even garage floor. The reality can be roller marks, colour variation, uneven sheen, thin sections, thick sections, patchy flake coverage and areas that draw your eye every time you walk past them.
This does not happen because homeowners are lazy. It happens because epoxy flooring is less forgiving than it looks.
Many retail kits are designed to be user-friendly. To make them easier to apply, they are often thinner than commercial systems. That can help a novice roll the product out, but it can also reduce film build. A thinner coating may not self-level as well, may show roller marks more easily, and may not hide imperfections in the concrete.
Concrete is rarely perfectly flat or perfectly consistent. It has high points, low points, old stains, patched areas, trowel marks, cracks and small imperfections. When a thin coating is applied over those variations, the finished floor can reveal more than people expected.
Partial flake coverage can make this worse. A sparse sprinkle of flakes does not hide inconsistencies. In some cases it highlights them, because your eye notices the gaps and uneven distribution.
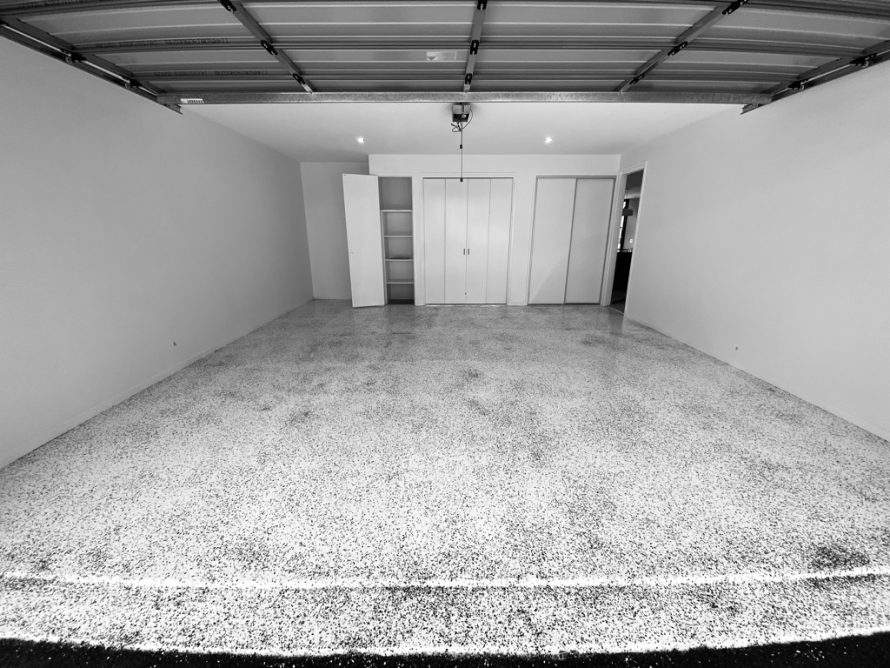
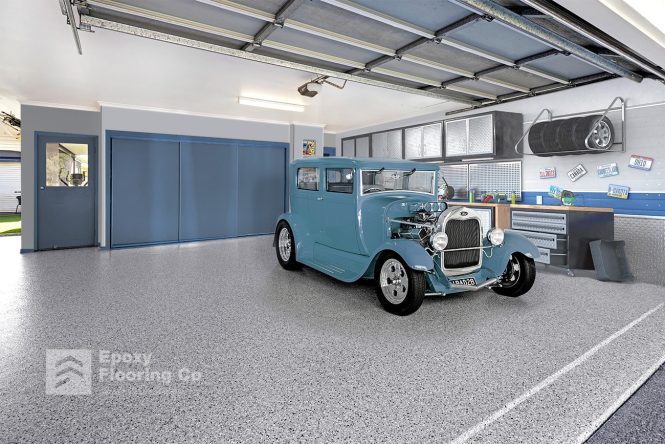
This is why professional full-flake systems can look more consistent. The flakes create a complete decorative layer, break up the surface visually, hide minor imperfections and create a uniform pattern across the whole floor. DIY kits for a garage generally provide 500gm of flakes. A professional installer will use around 20 Kilograms of flakes.
The expectation is: “I just roll it on like paint.”
The reality is: the final appearance depends on preparation, product thickness, working time, flake volume, application technique and topcoat quality.
If you are going to DIY, take the appearance side seriously. Measure the area accurately. Buy enough product. Buy more flake than you think you need. Plan your exit path. Have every tool ready before mixing anything. Once the coating is mixed, the clock is running. Divide the floor into 4 sections and weigh the flakes and apportion them into quarters, one for each section.
Problem 4: Poor surface preparation and peeling
Surface preparation is the least glamorous part of epoxy flooring and the most important.
Most failed floors do not fail because someone forgot to make them shiny. They fail because the coating never bonded properly to the concrete underneath.
Concrete is porous. It can hold dust, oil, moisture, old sealer, tyre residue, curing compounds, paint, dirt and other contaminants. Some slabs look clean while still being a poor surface for epoxy. That is why preparation cannot be treated as a quick cleaning step.
Epoxy needs the right surface profile. In plain English, the concrete needs to be opened up so the coating can grip. Professional installers usually achieve this with diamond grinding. Grinding removes weak surface material, opens the concrete, helps remove old coatings or sealers, and creates a mechanical profile for the coating to bond to.
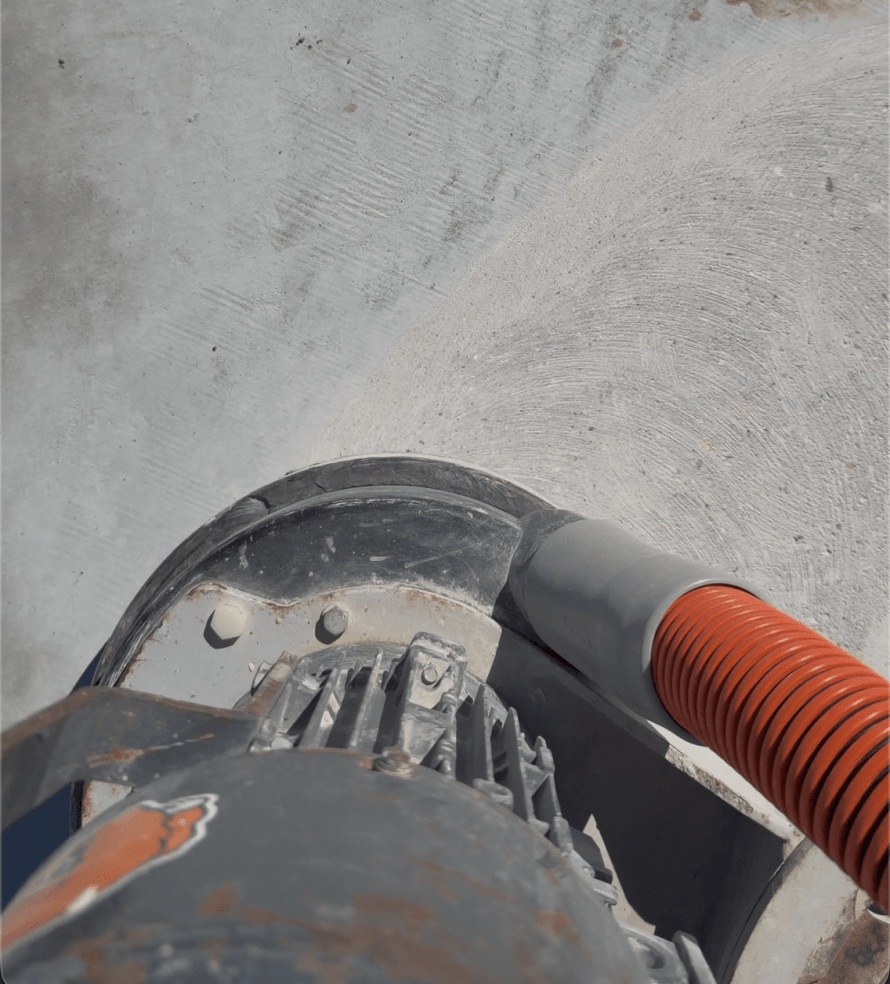
Many DIY kits rely on acid etching or a bottled prep solution. Acid etching can help in certain situations, but it is not the same as mechanical grinding. It may not remove oil. It may not remove sealer. It may not create an even profile. It can leave residue if not neutralised and rinsed properly. It also introduces water into the slab, which then needs time to dry.
A simple analogy is painting timber. If you applied premium paint over glossy varnish without sanding it first, you would not blame the paint when it peeled. The surface was never ready to accept the coating.
Concrete is no different.
The expectation is: “The prep bottle in the kit will be enough.”
The reality is: the coating can only bond to what is actually on the surface. If that surface is dust, oil, sealer or weak concrete, the coating is bonding to the wrong thing.
Peeling often starts around edges, expansion joints, drive paths or contaminated areas. Once it starts, it usually spreads. Small patches can sometimes be touched up visually, but widespread bond failure usually needs removal and proper preparation before anything else can go down.
That is why the cheapest DIY floor can become expensive later. The cost is not only the kit. It is the weekend spent installing it, the frustration of watching it fail, and then the cost of removing the failed coating.
A line worth remembering
Prep is not a small step in the process. In many ways, prep is the process.
Can a DIY epoxy kit actually work?
Yes, a DIY kit can work when the expectations and the environment match the product.
A DIY kit may be reasonable if the space is light-use, the concrete is in good condition, the slab is dry, there is no sunlight exposure, vehicles will not be parked on it every day, and you are comfortable with a finish that may not look or perform like a professional system.
It may also suit someone preparing a property for sale, freshening up a storage area, coating a small workshop where appearance is not critical, or improving a tired garage on a limited budget.
Where DIY becomes risky is when the homeowner expects a long-term floor that will handle daily vehicle traffic, hot tyres, sunlight, heavy use and easy cleaning for years.
There is a big difference between “better than bare concrete” and “built to perform as a long-term garage flooring system.” Both goals are valid. They are just not the same goal.
How to give your DIY floor the best chance of success
If you are still keen to tackle the project yourself, there are practical steps that can improve your chances of success. None of these guarantee a perfect floor, but they can help you avoid the most common mistakes.
- Start with the right expectation. Decide whether you want a short-term cosmetic improvement or a long-term garage flooring system. That decision should guide the product you buy and the preparation you are willing to do.
- Check the concrete before buying anything. Look for old sealers, paint, oil stains, moisture, cracks, dusting concrete and areas that sound hollow. If water beads on the surface instead of soaking in, there may be a sealer present.
- Prepare mechanically where possible. Hiring a suitable concrete grinder and vacuum is more work than using a prep bottle, but it can make a major difference to adhesion.
- Buy enough material. Many disappointing DIY finishes come from stretching a kit too far. Coverage rates can be optimistic if the concrete is rough, porous or inconsistent.
- Use more flake if you want a consistent finish. A light sprinkle is very different from a full broadcast. If appearance matters, calculate flake quantities properly.
- Respect pot life and cure times. Have the floor masked, tools ready and plan clear before mixing. Give the coating longer to cure before driving on it, particularly in cooler weather.
- Think about safety and slip resistance. Read the safety data sheet, ventilate the area, wear the correct protective equipment and understand whether the finished surface needs an anti-slip additive.
- Buy a topcoat to protect the flakes and floor and make sure it is 100% UV stable.
Questions to ask before buying a DIY epoxy kit
Before you buy a kit, ask a few questions. The answers will tell you a lot about what the product is actually designed to do.
How much area does the kit really cover?
Look at the coverage rate carefully. If a kit claims to cover a large area with a very thin film, the floor may not end up with the build you were imagining.
Is the coating suitable for hot tyres?
Do not rely only on the word garage. Look for clear information about hot tyre resistance and cure time before vehicle traffic.
What preparation does the manufacturer recommend?
If the system relies on a quick chemical clean only, understand the limitations. Surface preparation is usually where DIY floors succeed or fail.
Is the topcoat UV stable?
If the garage receives sunlight, the topcoat and flake coverage are critical and you must use extra flakes. Remember epoxy exposed to UV will yellow over time.
Does the kit include enough flake for the finish you want?
There is a major difference between decorative sprinkle coverage and a full-flake broadcast.
What happens if the floor fails?
Failed coatings often need to be ground off before anything else can be applied. It is worth thinking about that before you begin.
Common questions
Can I fix a DIY epoxy floor that has started peeling?
Small isolated areas can sometimes be patched, but widespread peeling usually means the bond has failed. The failed coating normally needs to be removed so the concrete can be prepared properly.
Can I just add another coat over the top later?
Only if the existing coating is sound, clean and properly prepared. Coating over a failing floor usually hides the problem temporarily rather than solving it.
Are flakes only decorative?
No. Flakes improve appearance, help hide inconsistencies, add texture and can help protect the base coat when used as part of a full broadcast system.
Is acid etching enough preparation?
Sometimes it improves the surface, but it is not the same as diamond grinding. It may not remove oil, sealer or weak surface material.
Is professional installation always necessary?
Not always. It depends on your expectations, budget, concrete condition and how the space will be used. The important thing is understanding the limitations before deciding.
Final thoughts
There is nothing wrong with wanting to coat your own garage floor. For the right person, in the right space, with the right expectations, a DIY kit can be a satisfying project.
But epoxy flooring is not as simple as the box can make it appear. The coating is only one part of the system. Surface preparation, film build, flake coverage, UV resistance, hot tyre resistance, cure time and topcoat selection all play a role in the final result.
A DIY kit is not automatically a bad product. It is simply a product designed to meet a different expectation.
If your goal is to make an old garage look cleaner for a few years, a retail kit may be enough. If your goal is a long-term floor that handles vehicles, sunlight and daily use, take the time to understand how professional systems differ before making your decision.
The best outcome starts before the floor is coated. It starts with asking better questions.